Quick Summary:
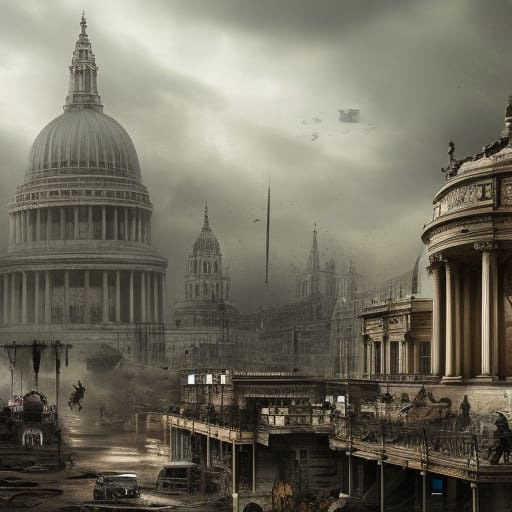
The coming months will end the war between the rich and the poor. The cost-of-living crisis split this country and revolution took hold.
Outposts have been set up in major London Landmarks as a sign of strength and wealth, the player and their team have been tasked with clearing them out.
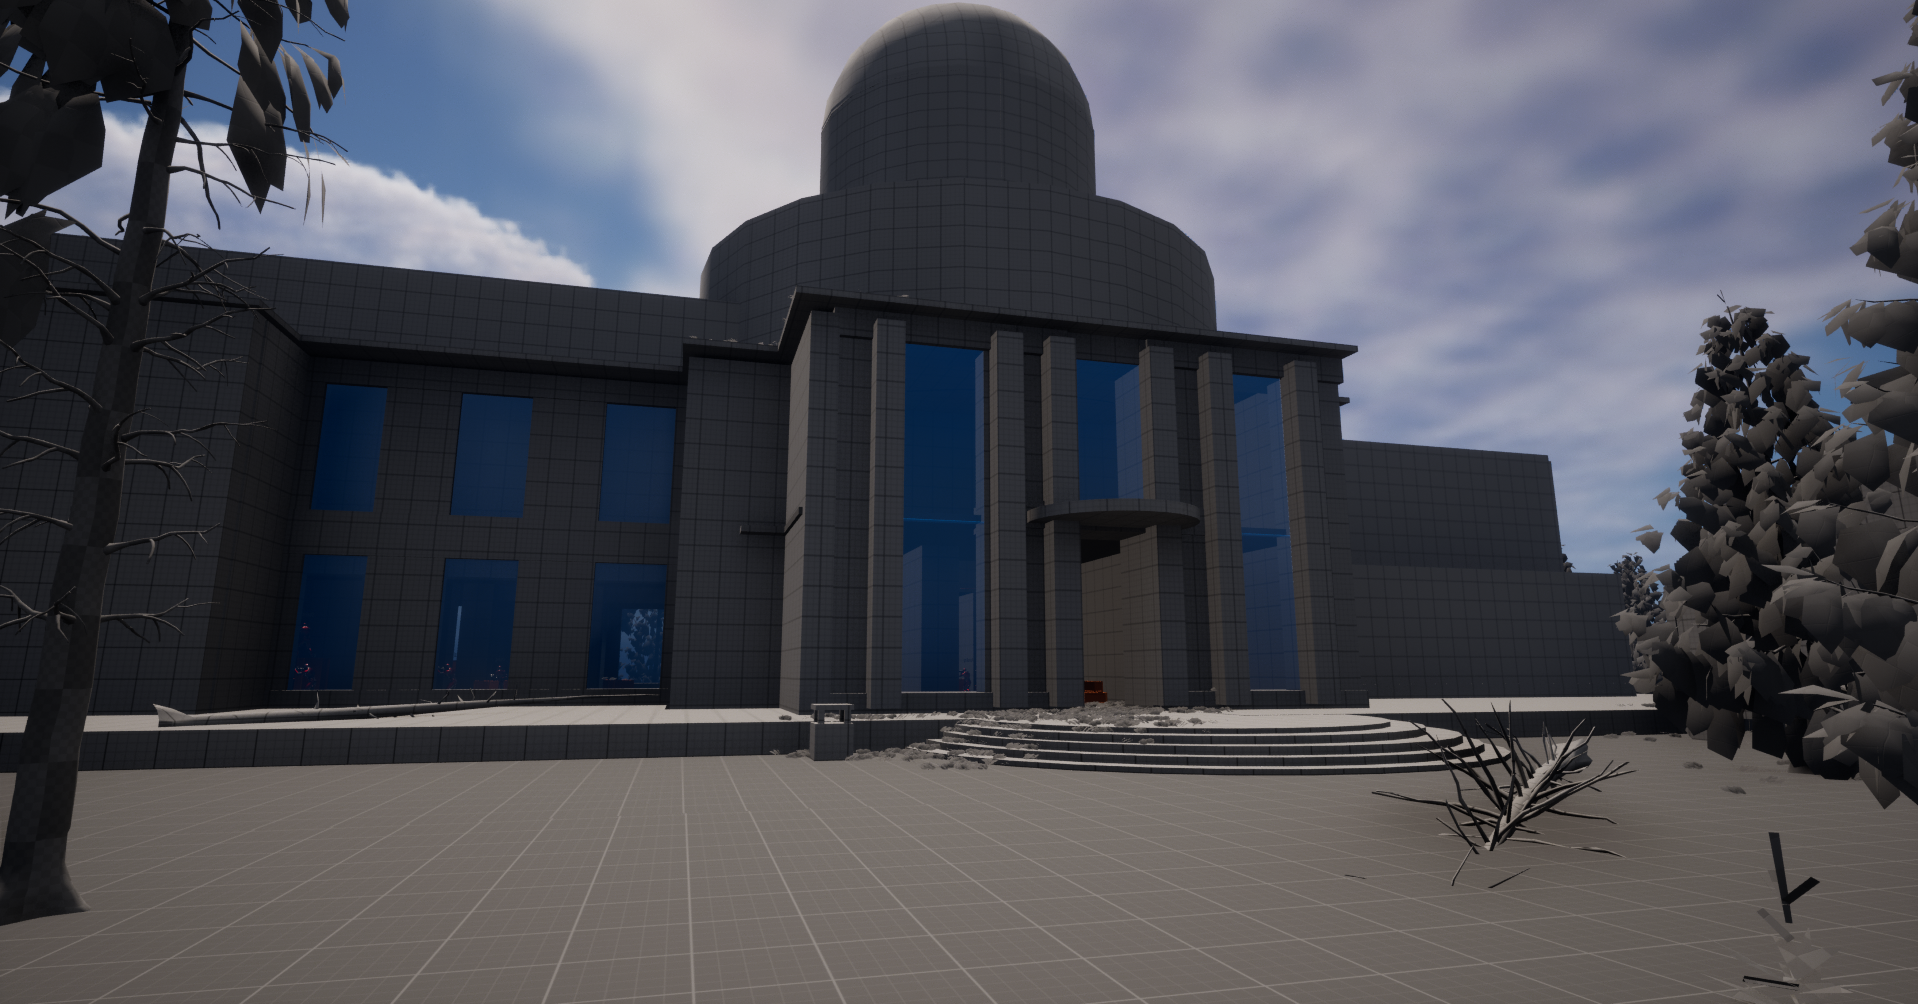
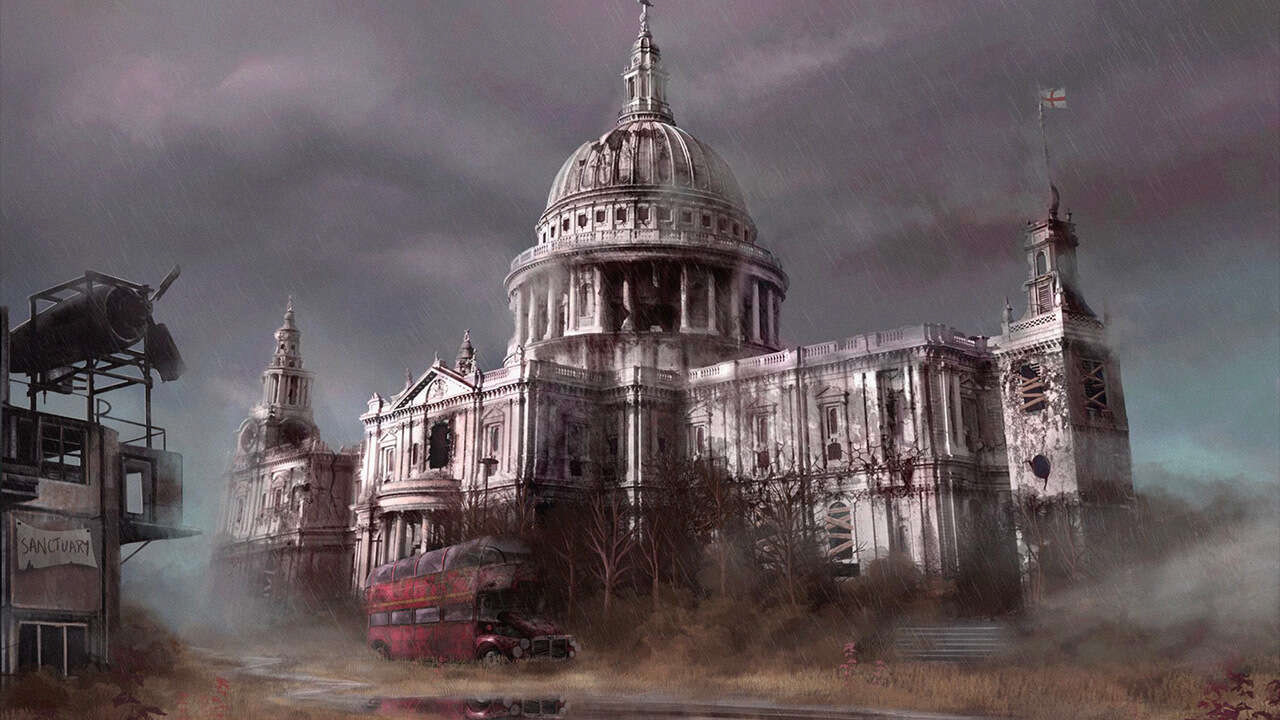
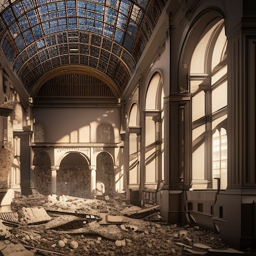
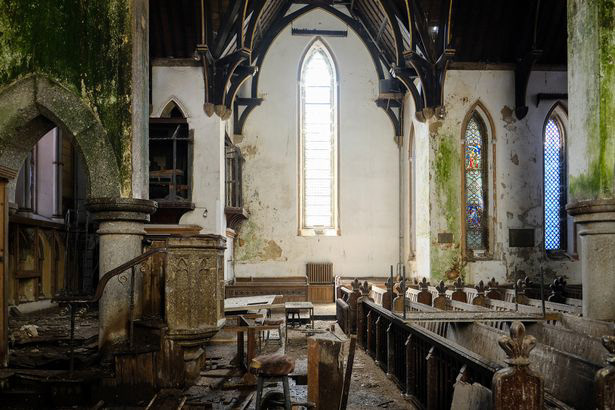
St Paul’s Outpost is newly created and is well fortified.
The players’ task is to reach the Chapel in St Paul’s and destroy the budding outpost’s resources before it takes control of the City.
This level will take the player approximately 15 minutes to complete.


Goals:
1. Teach the player how to Stealth Kill
2. Test mechanics already learnt from previous levels
3. Develop meaningful relationships with team mates
4. Amp the tension up from the previous level
Gameplay Overview:
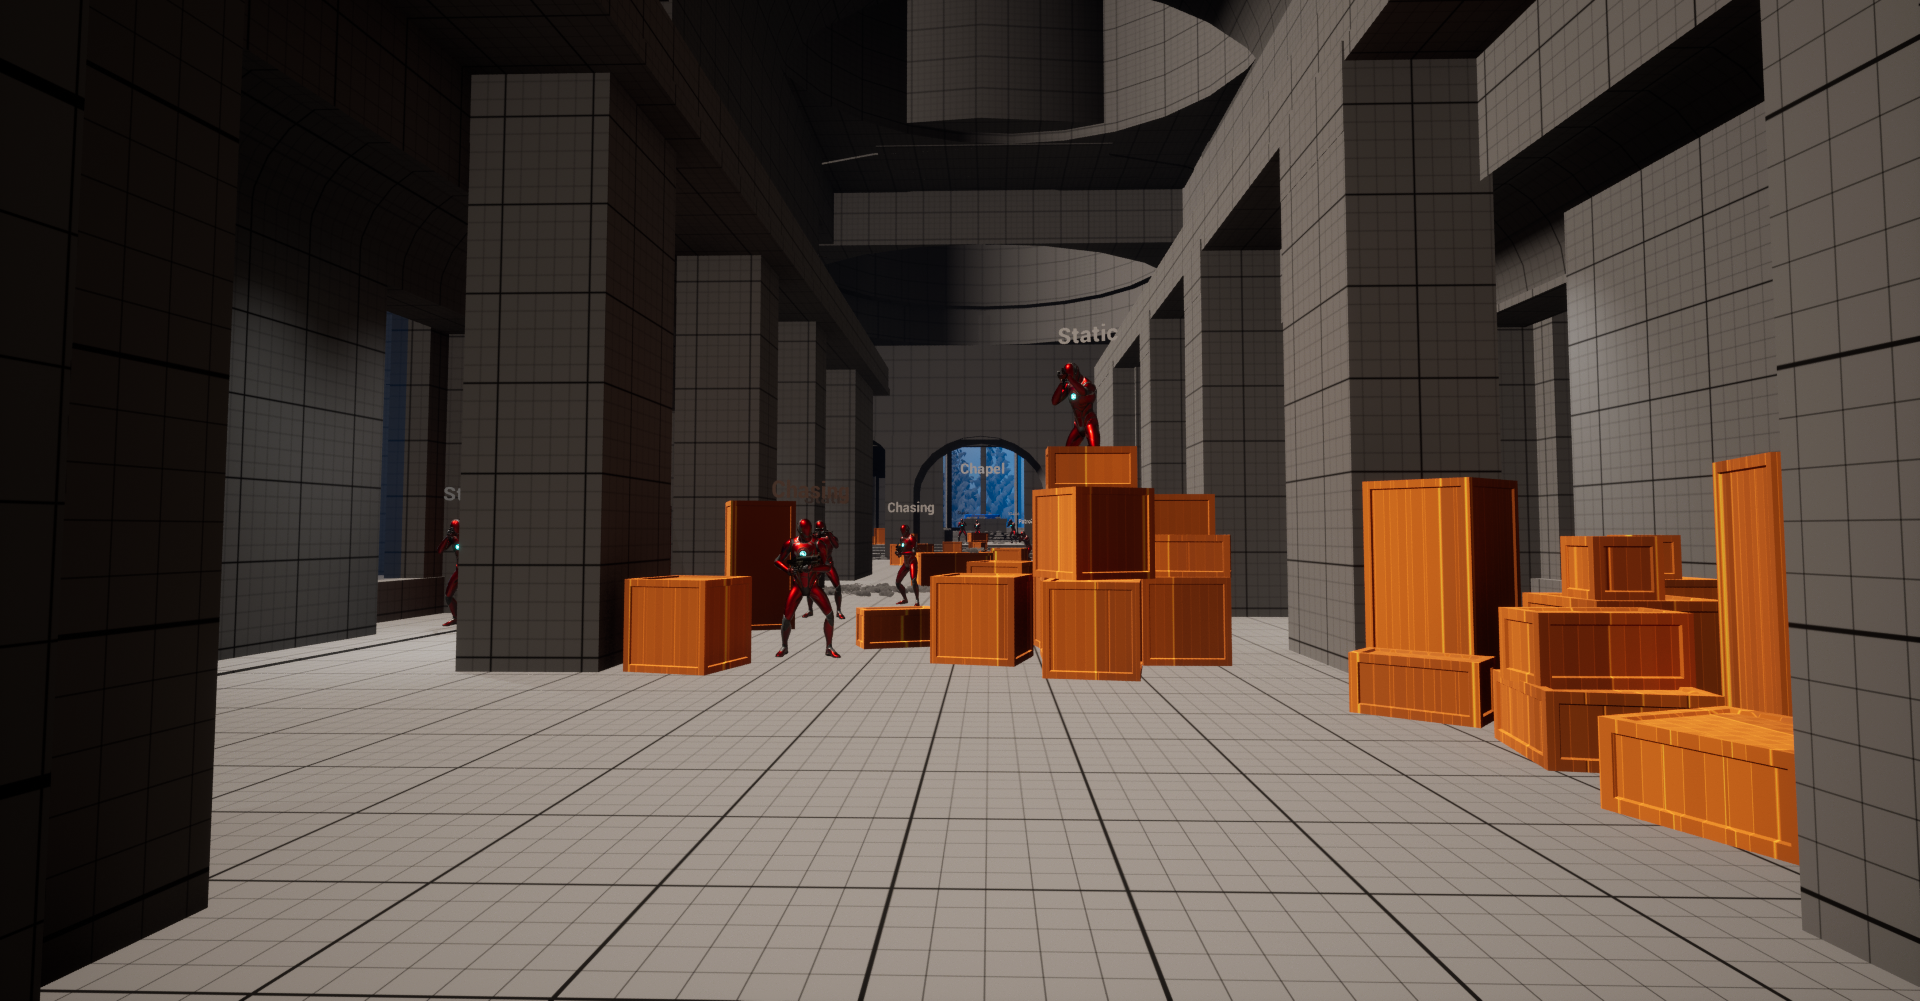
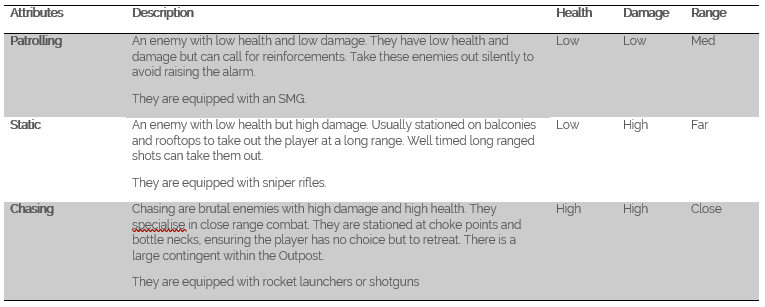
The player must make their way through the Cathedral as stealthily as possible, avoiding three different types of enemy – Chasing, Static, and Patrolling.
The player will have encountered the three enemies before, but not all at once and not when the primary gameplay is stealth. The player does not have to be stealthy, however, the level will be more fruitful and less combat heavy if they are during the first stages.
The player will have the option of three entrances into the cathedral, each with their own unique gameplay. One focuses on stealth killing and close quarter combat, the second on sniper fire and minimal interaction with enemies, the third tests the players ability to identify suitable cover.
Once the player has reached the objective in the chapel they will then trigger a high intensity combat sequence as they try to escape the Cathedral. The players choices earlier in the level will determine how challenging this encounter is.
Level Beats:

General Level Flow:
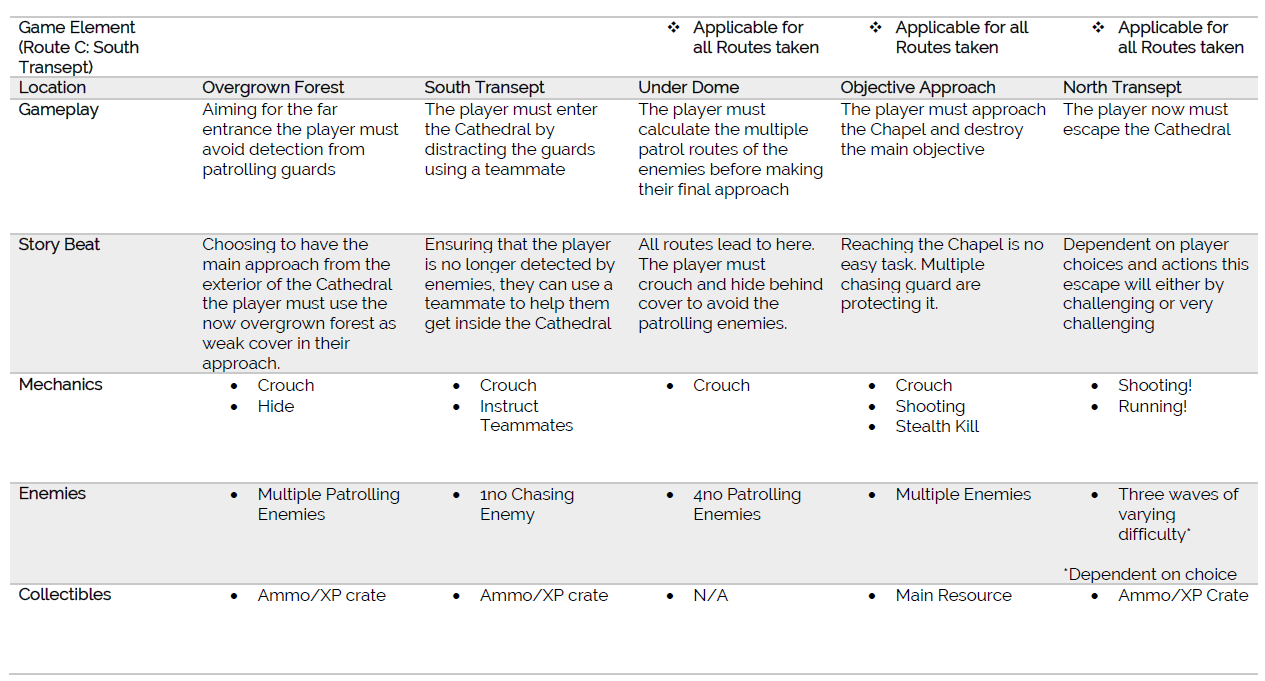
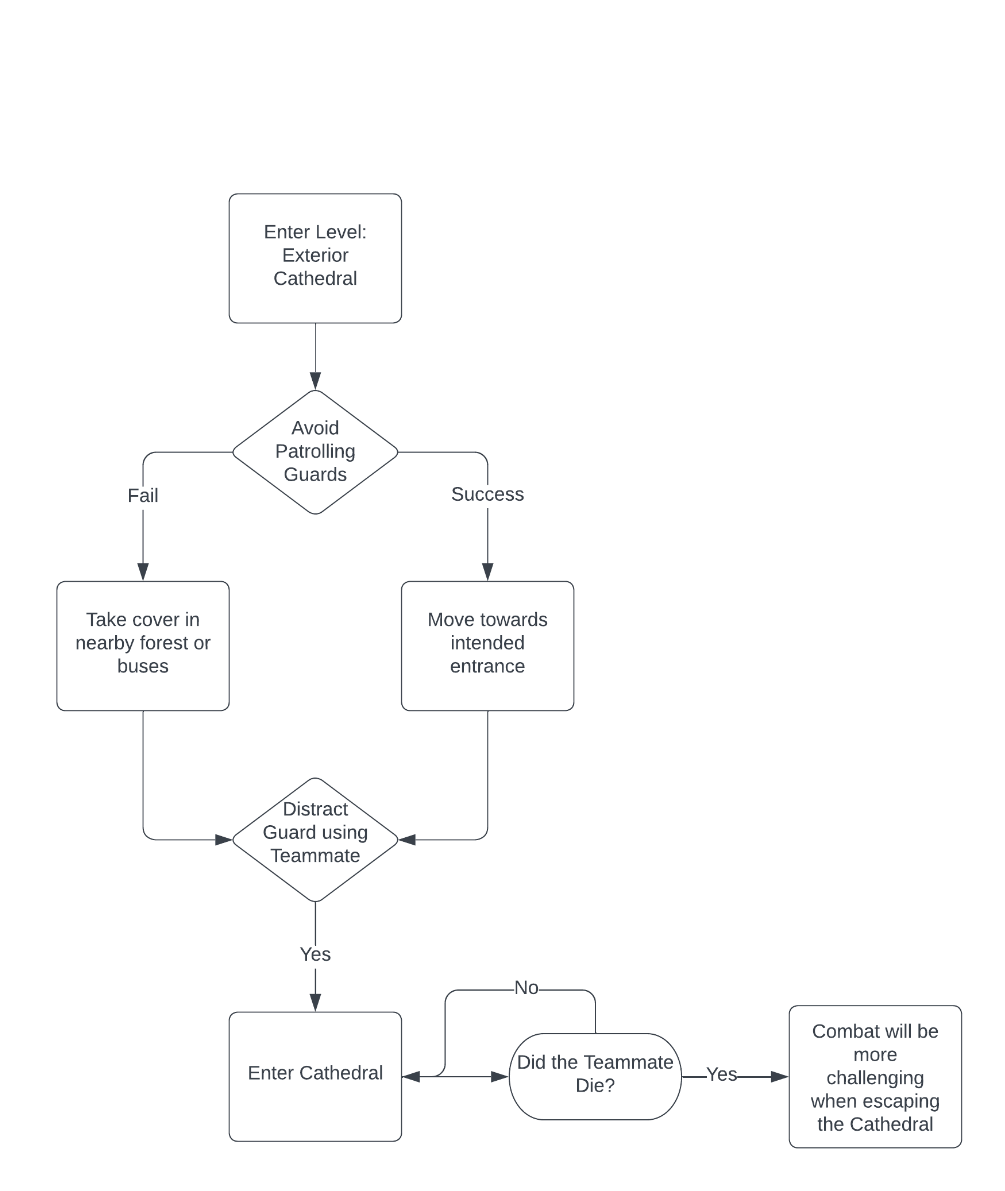
Exterior:
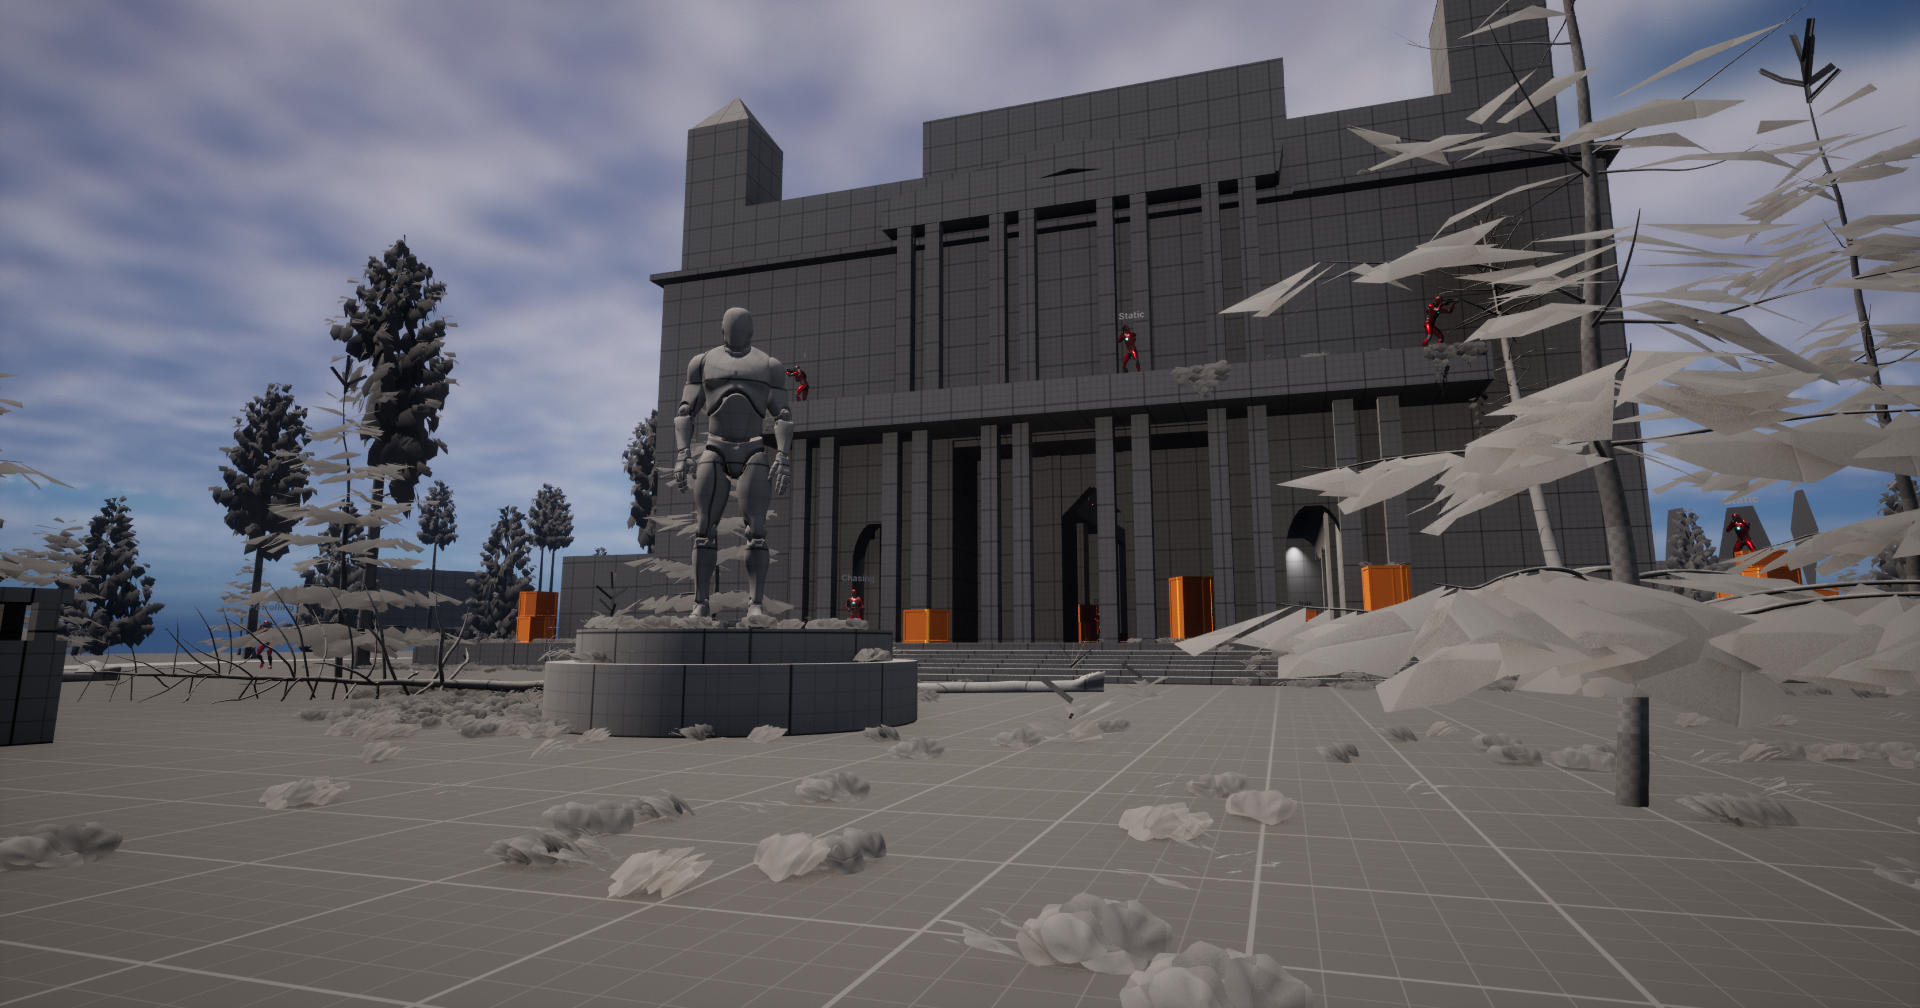
The player will head towards an entrance. This will be guarded and will require the player to send one of their teammates to distract them. They will then head inside the Cathedral
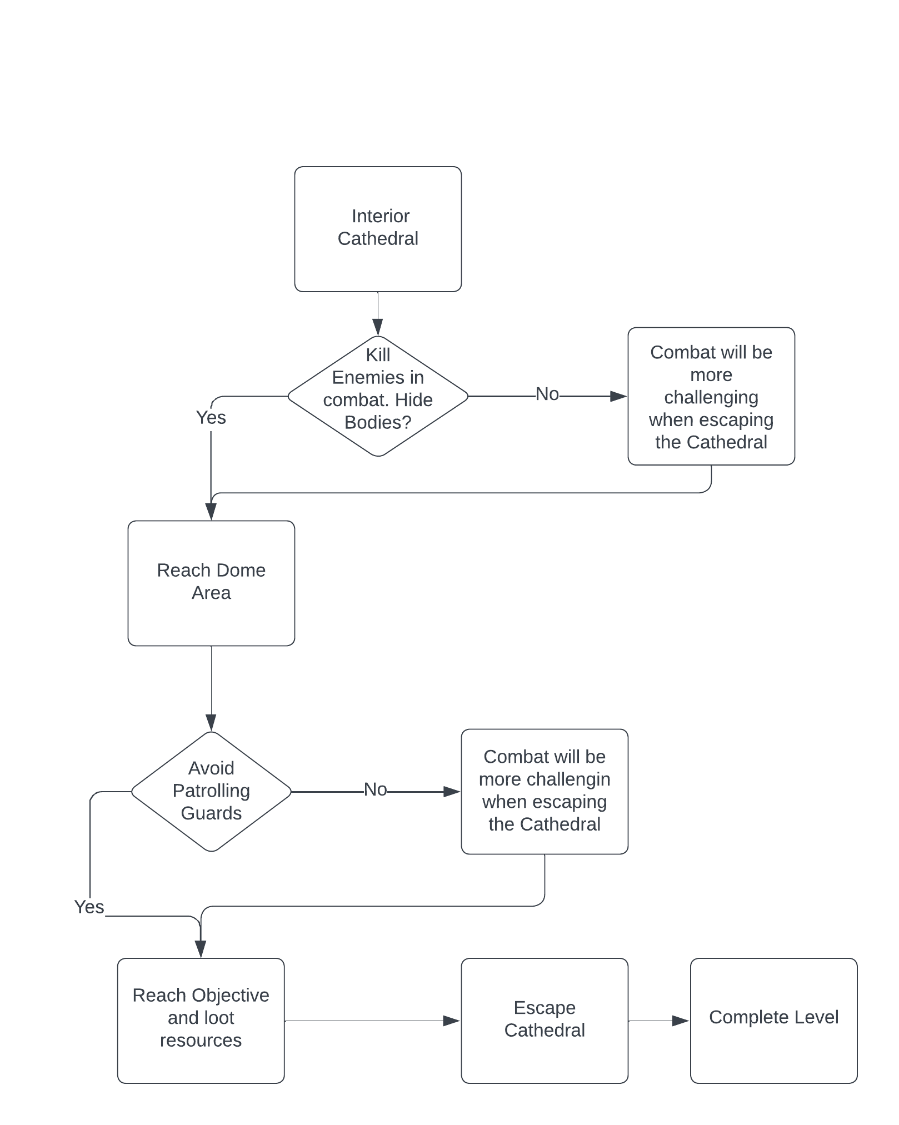
Interior:
The player will now encounter small combat sequences. Their actions here will determine how challenging the final combat sequence is when escaping the Cathedral. If bodies are hidden and teammates survive then the escape will be easier.
Visual References:


Enemy Archetypes:
Maps:
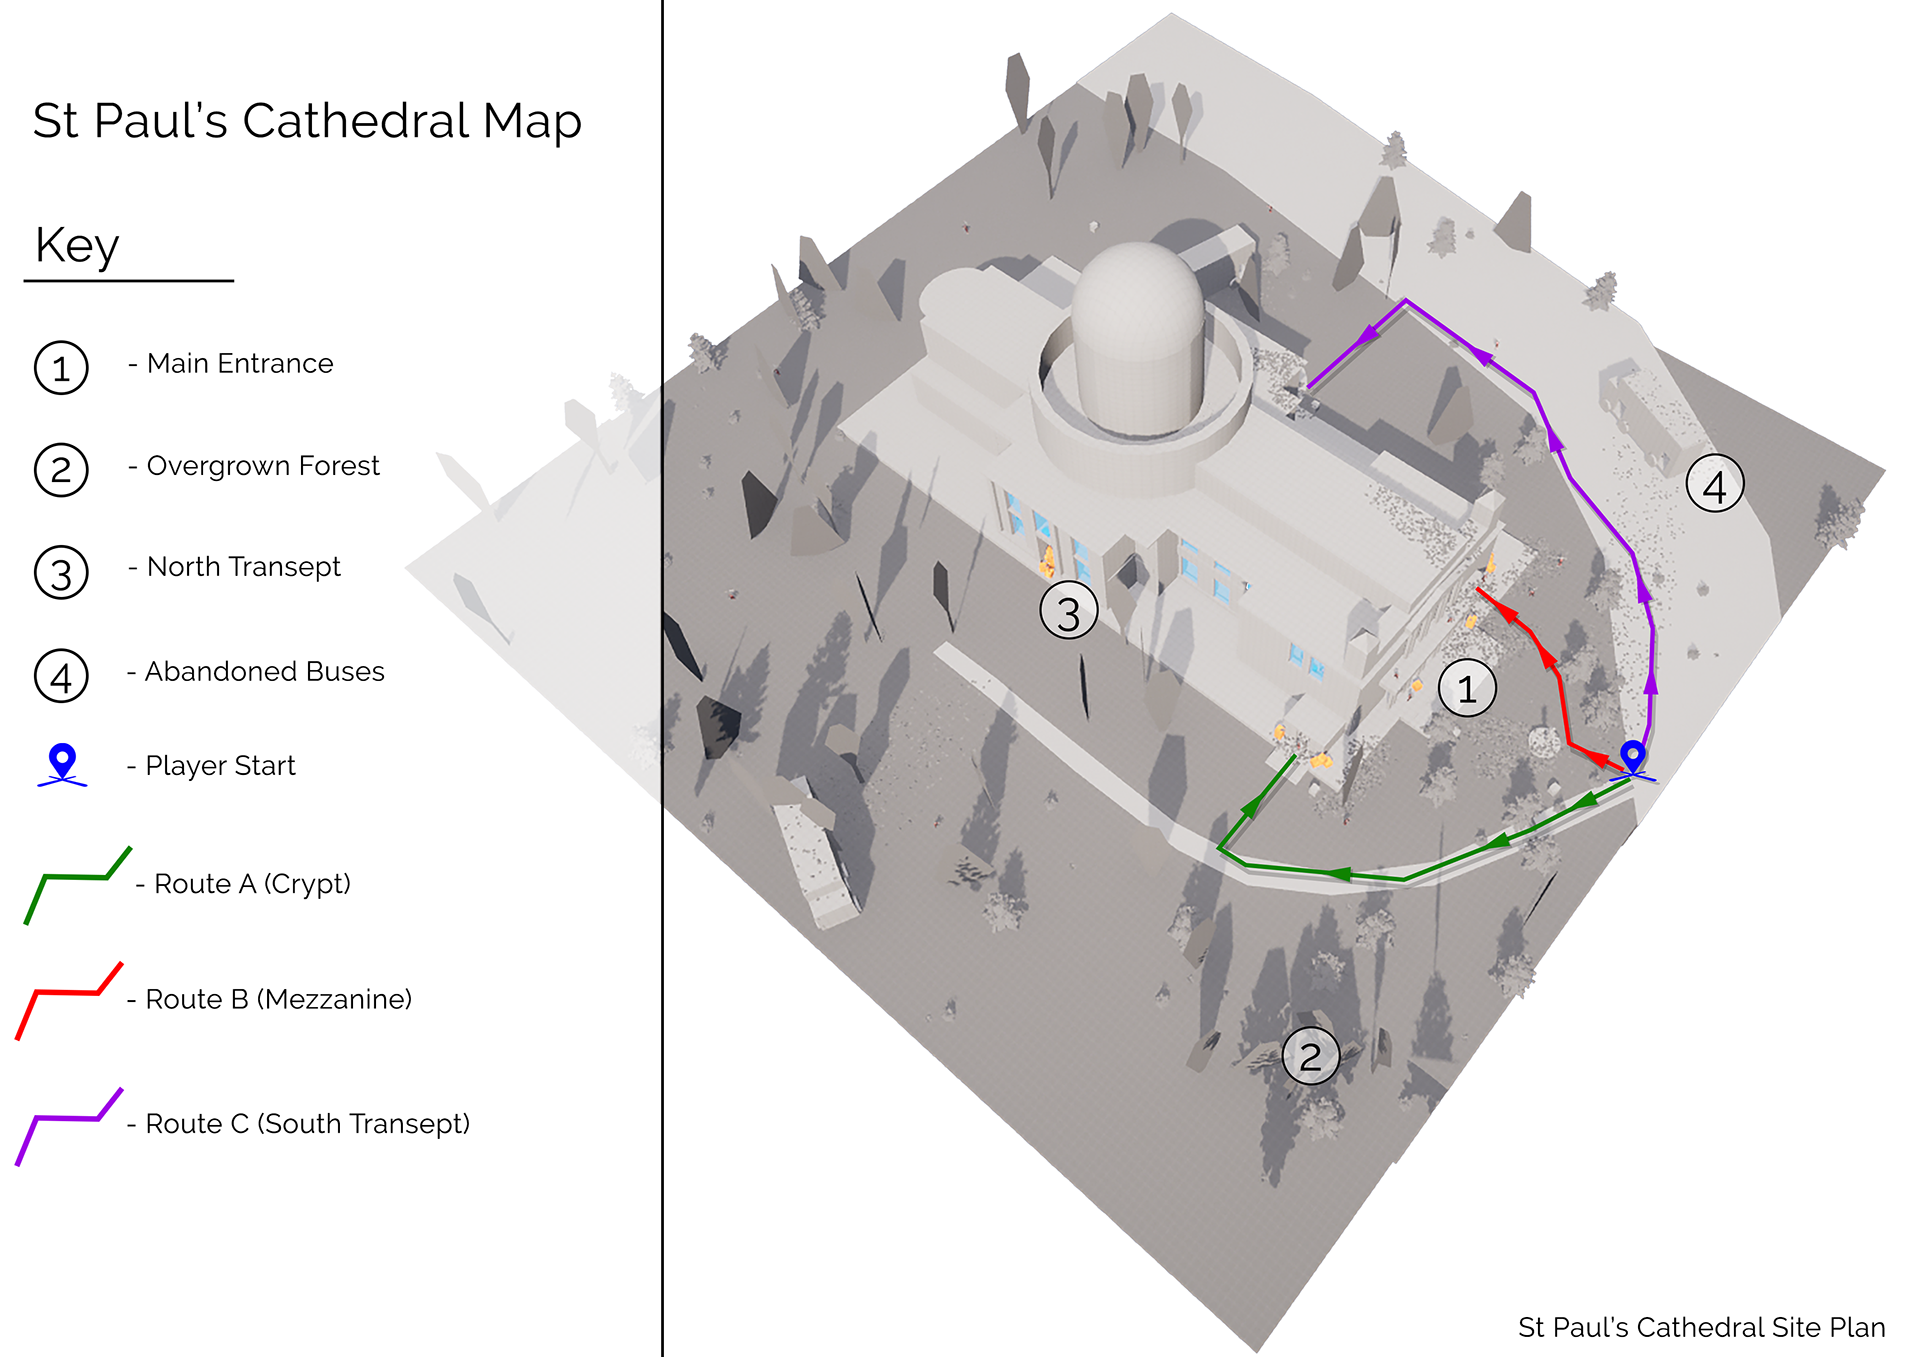
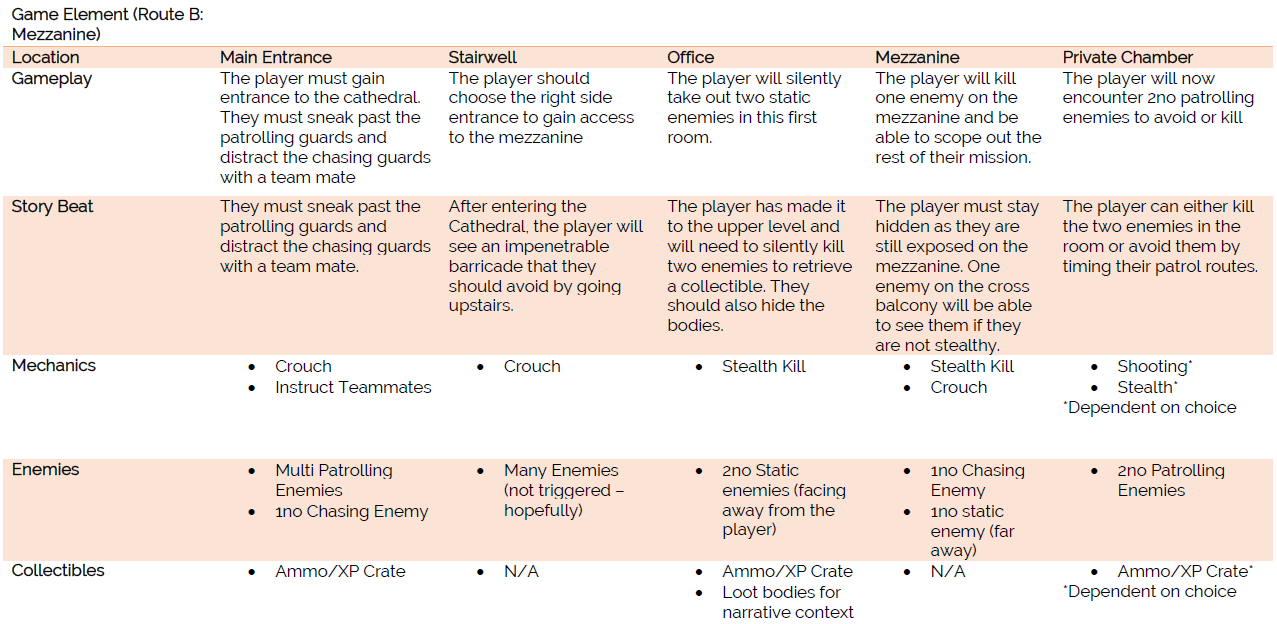
1. Main Entrance:
There are three doors at the main entrance:
The central one takes the player straight into the firing line of the main barricade
The left one takes the player down a well-guarded corridor
The right takes the player up to the mezzanine level (Route B)
2. Overgrown Forest:
The greenery around the Cathedral has been unkept for 40 years creating an overgrown wooded area. This can be used for cover when the player is outside of the Cathedral.
4. North Transept:
This door has a well defended barricade which the player should not take head on. This can however be used as an escape route when the objective has been reached.
5. Abandoned Buses:
These buses can provide cover for the player, as well as a place to regenerate health. These are good to hide in from Chasing Enemies.
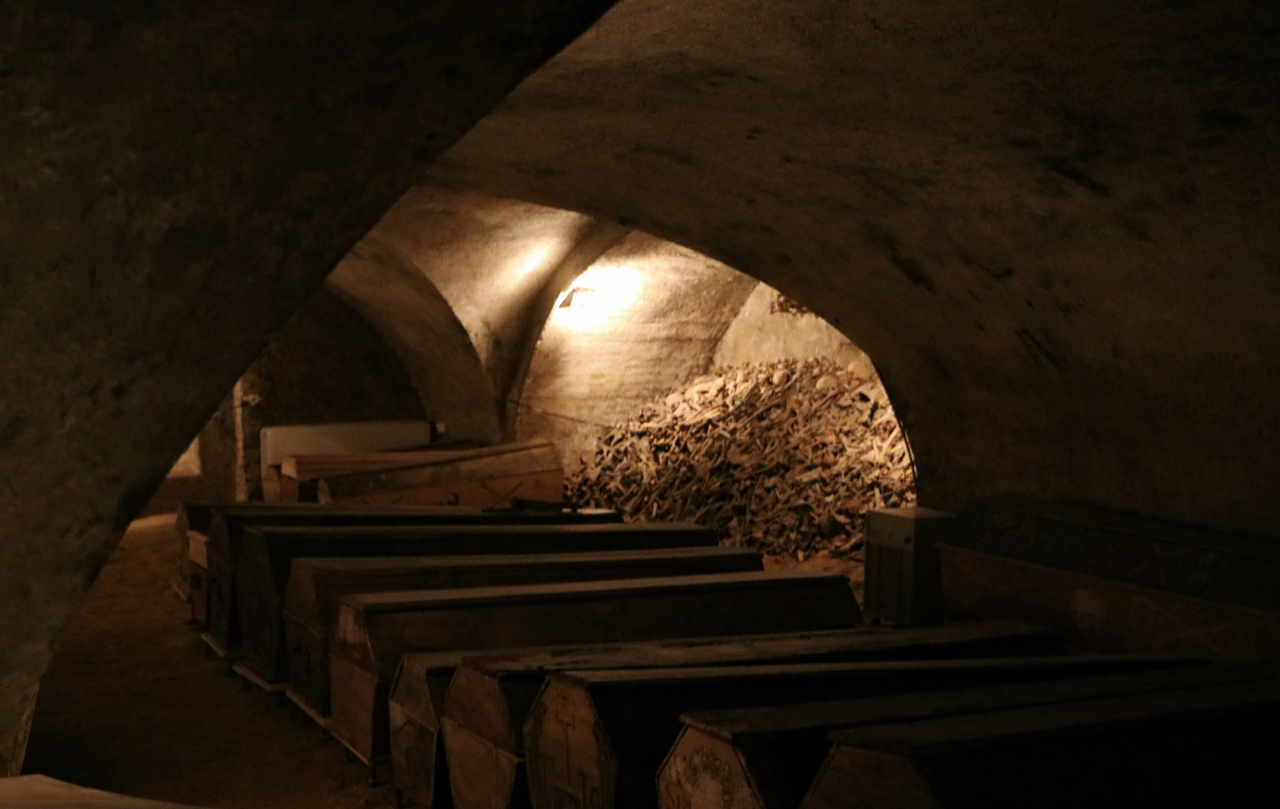
Route A (Crypt)
This Route takes the player underneath the Cathedral. Close range combat and stealth will be needed to get through these tight corridors.
Route B (Mezzanine)
This Route will take the player above the main body of the Cathedral. The player can equip a sniper rifle and remove enemies below.
Route C (South Transept)
Route C primary action is outside of the Cathedral. Using the overgrown forest as cover from patrolling enemies.

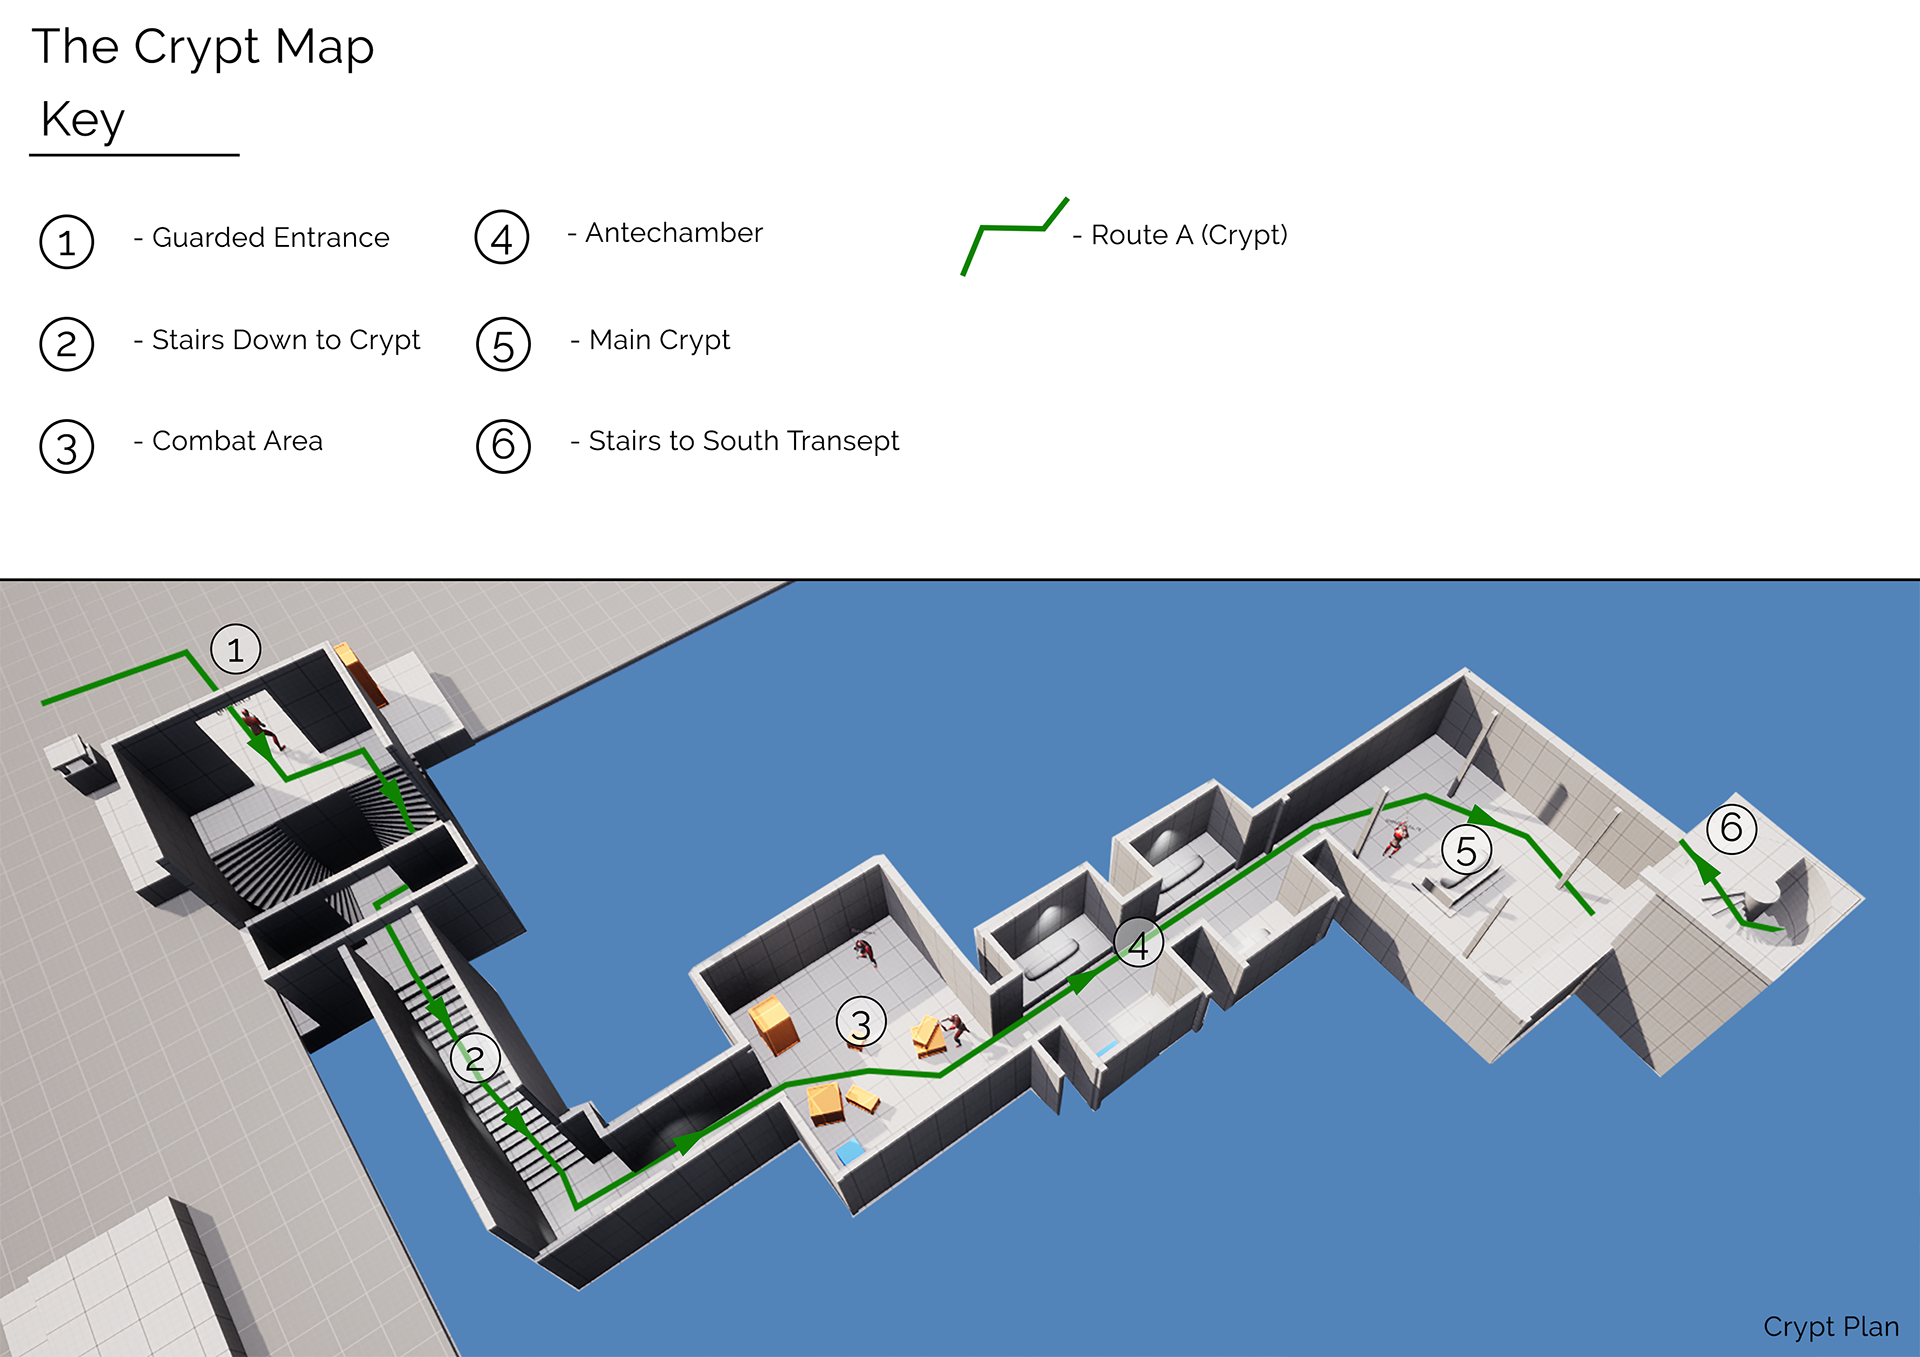
The Crypt challenges the players use of cover and stealth with minimal combat.
There are two crates to collect in this area.
1. Guarded Entrance:
This entrance has one Chasing enemy guarding it.
To remove this enemy without drawing attention, the player can distract the enemy with a team mate forcing them to chase them.
The player can then enter the crypt and recall all team mates.
2. Stairs Down to Crypt:
The stairs down are poorly lit. This will ramp up the tension before the first combat area
3. Combat Area:
There are two enemies in this room behind cover.
They should be taken out and the bodies hidden in the antechamber – so as not to arouse suspicion.
There is a crate of Ammo and Health in this room
4. Antechamber:
The antechamber can be used to hide the bodies from the previous room. The burial chambers can be opened and the bodies placed inside
The player will have an obstructed view into the next room.
There is a crate of Ammo and Health in one of the burial chambers.
5. Main Crypt:
There is one patrolling enemy in this room.
The player can see the enemy from the previous room so can time their approach.
Pillars and a central burial chamber work as sparse cover for the player
6. Stairwell to South Transept:
Once the player has made it past the patrolling enemy, they can use the stairwell to take them to the main body of the Cathedral.
The Crypt Walkthrough
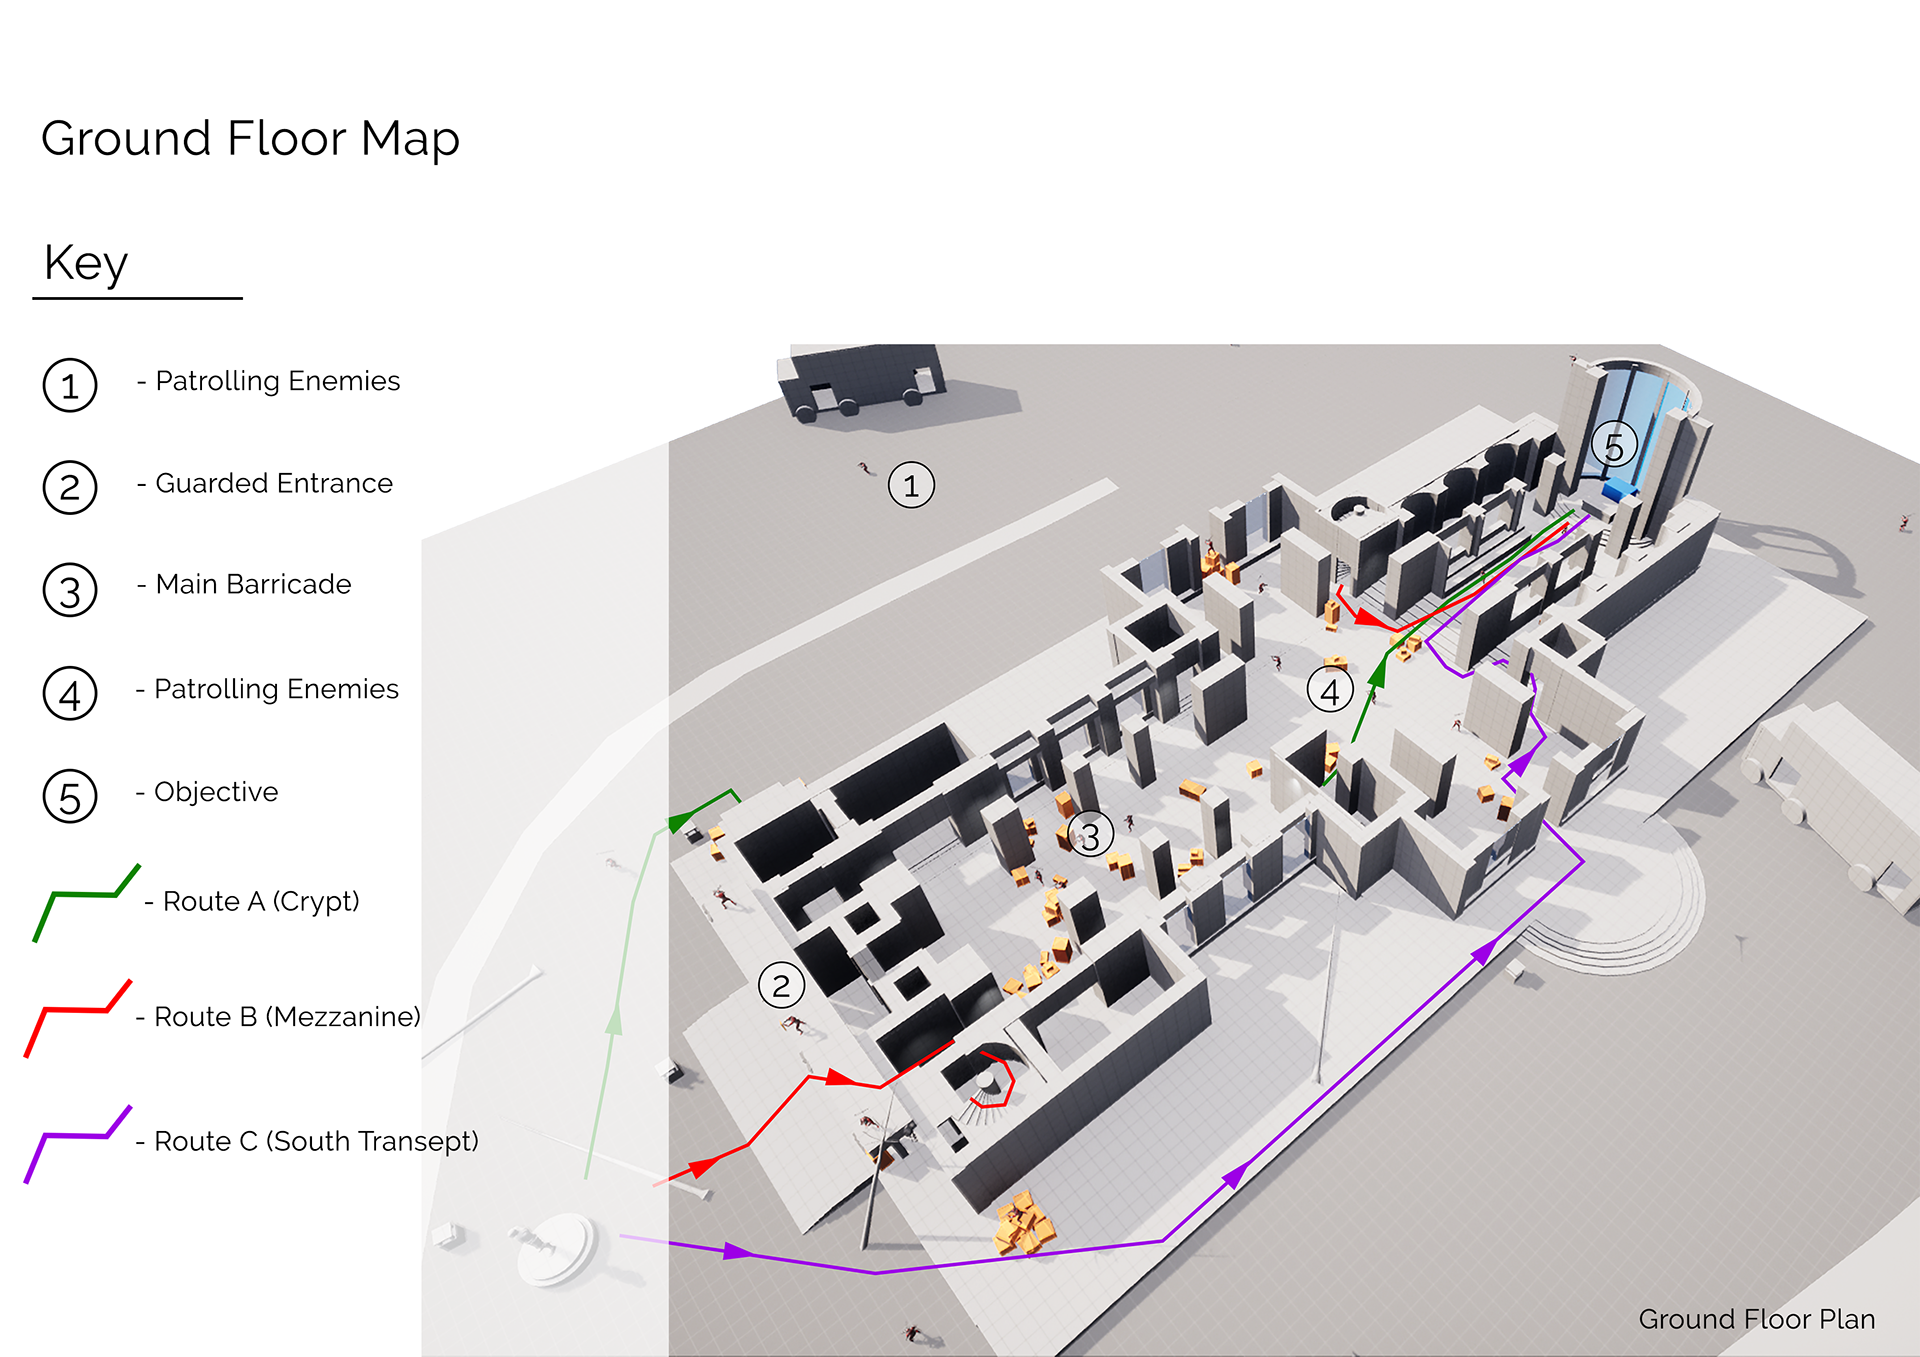
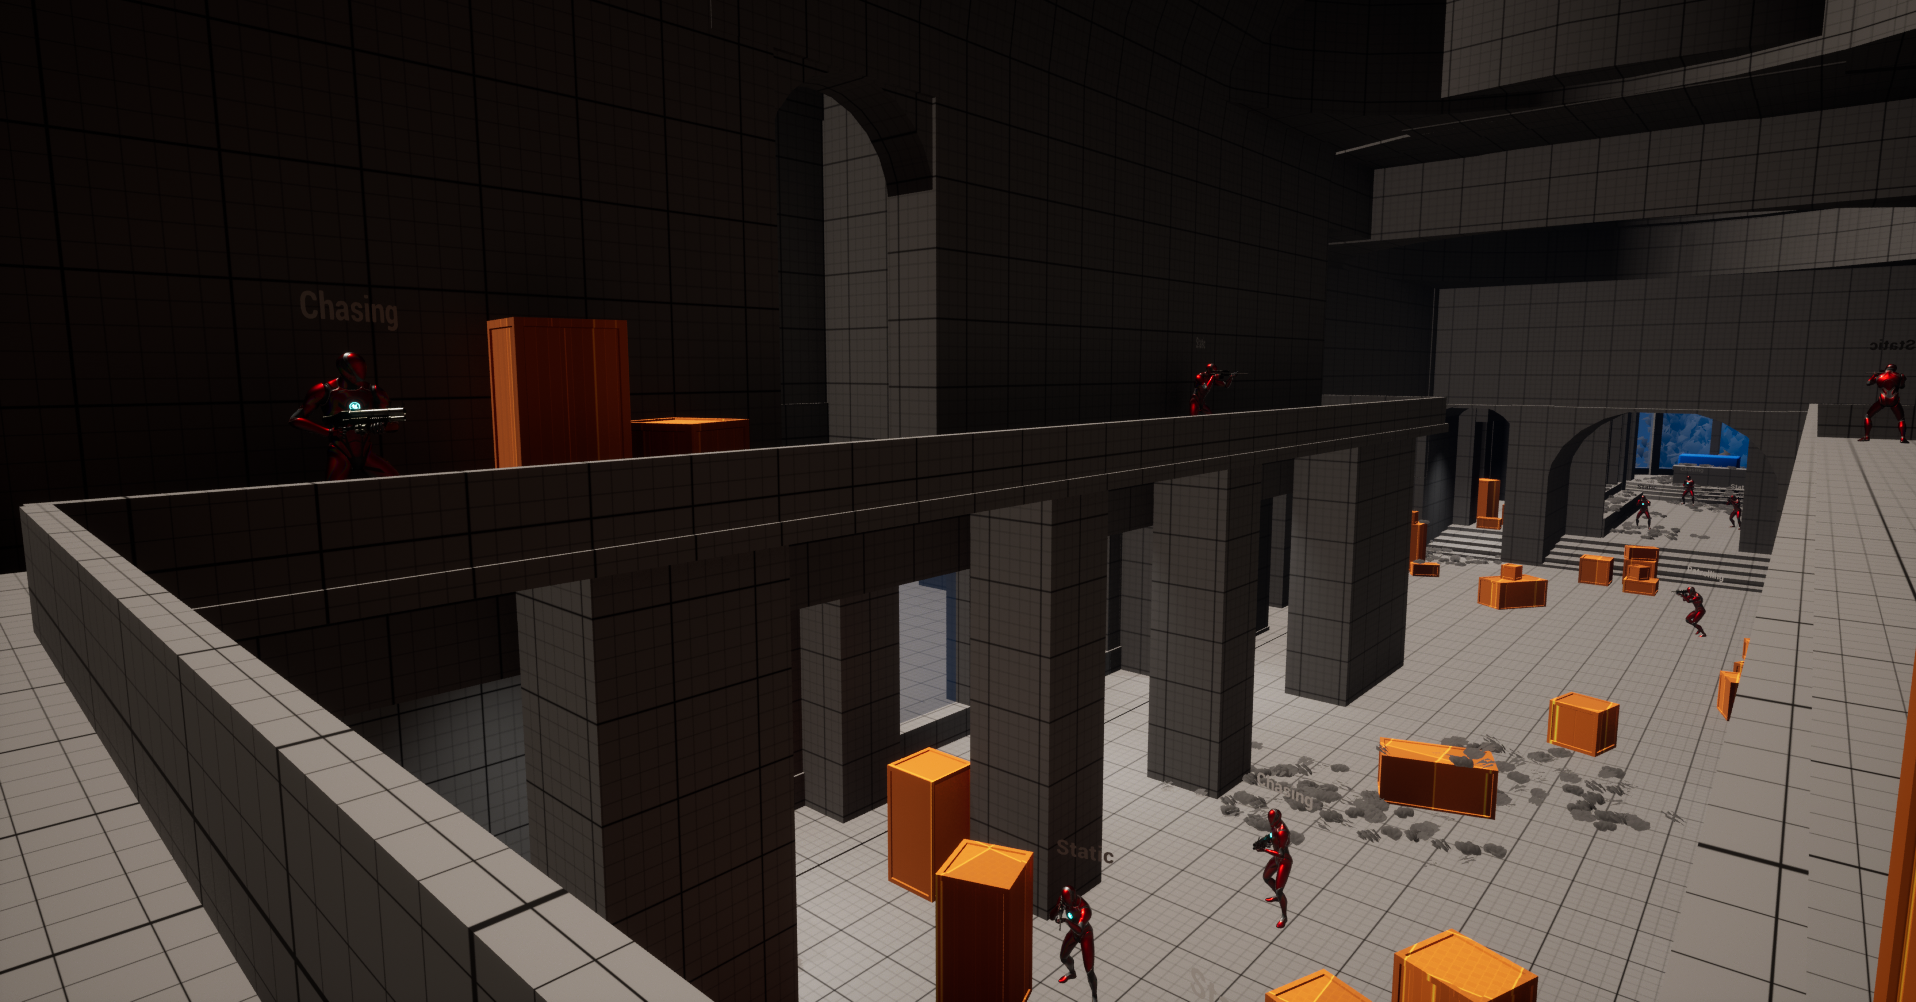
All three routes interact with the Ground Floor. This is the main body of the Cathedral with the most enemies. A full-frontal assault will almost always result in the player death. The player can plan different routes through the Cathedral with Route B being the most obvious.
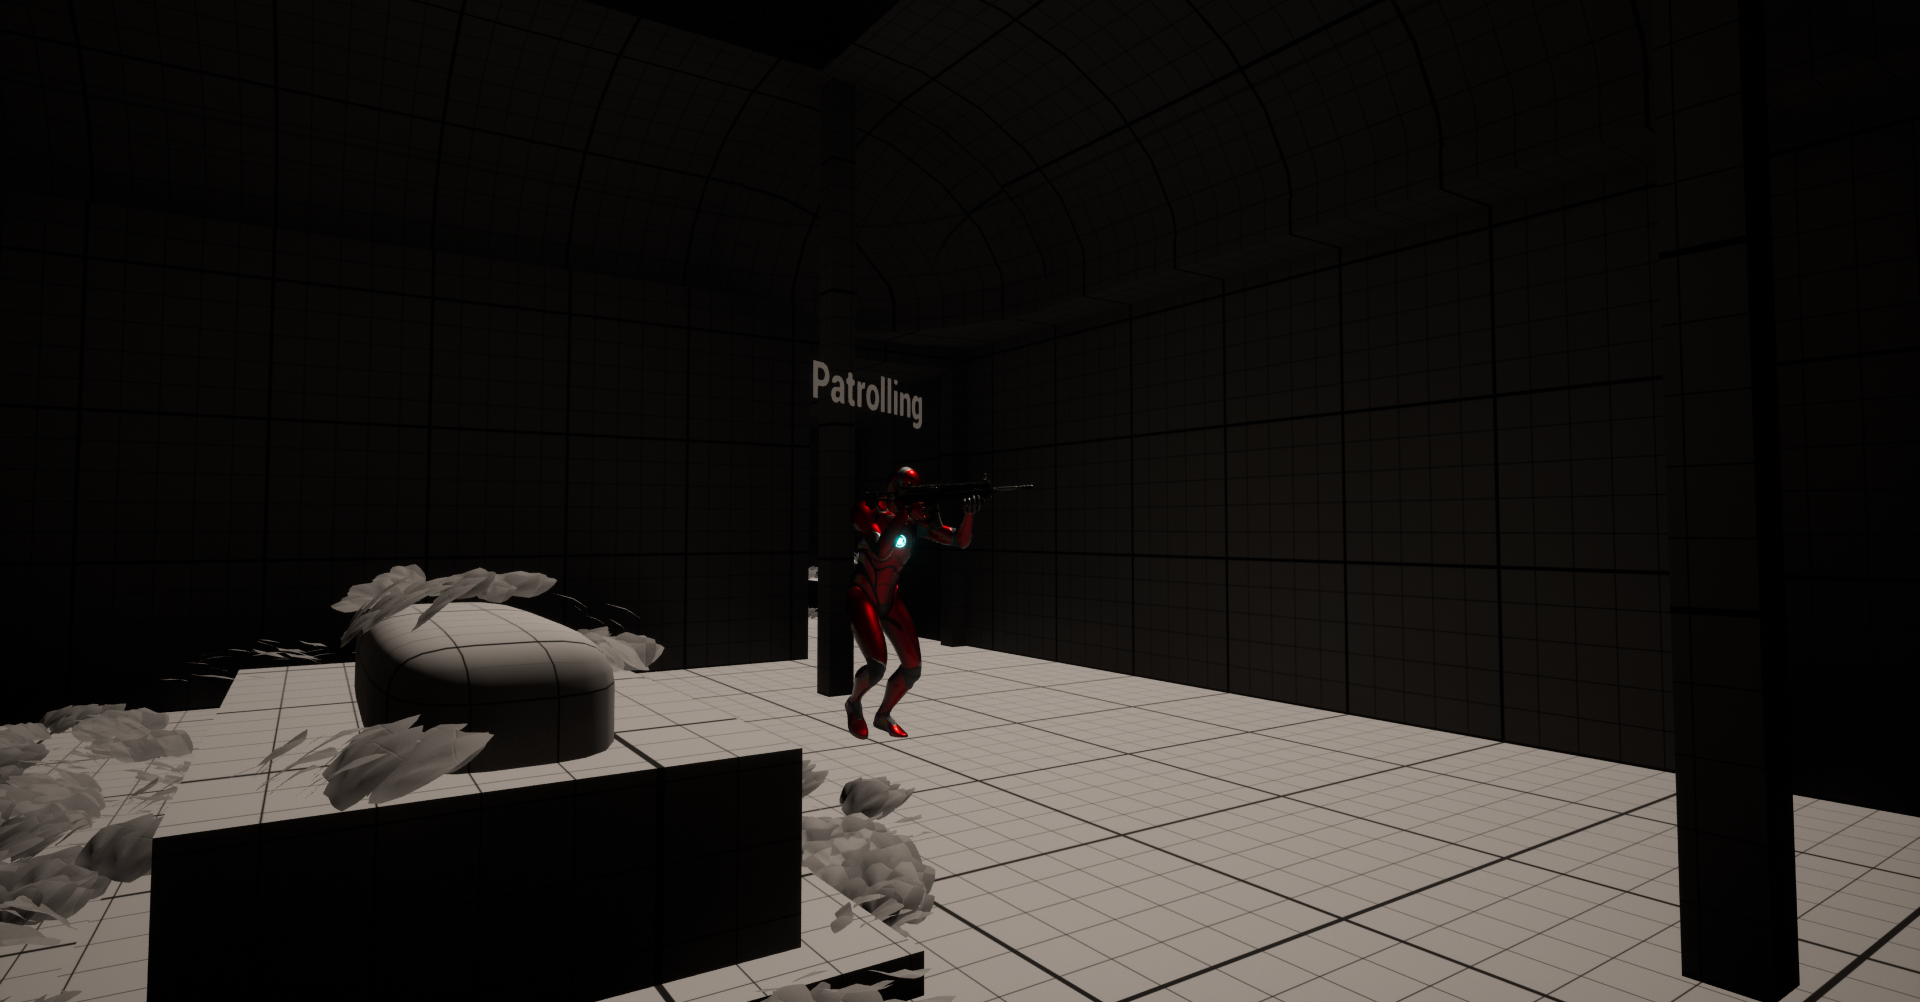
1. Patrolling Enemies:
There are multiple enemies patrolling the exterior of the Cathedral
These enemies can be avoided using the Overgrown Forest or Abandoned Buses as cover.
2. Guarded Entrance:
The entrance is guarded with Chasing enemies at ground level and static enemies above.
These enemies can be distracted by using your team mates.
3. Main Barricade:
The main barricade blocks the players approach and forces them to choose a different route.
This barricade is basically impenetrable.
There is a crate near here with Ammo and Health.
4. Patrolling Enemies:
Under the dome there is an open space littered with patrolling enemies.
The player will need to keep and eye on all the enemies and time their approach to the objective
All three routes take the player through this area.
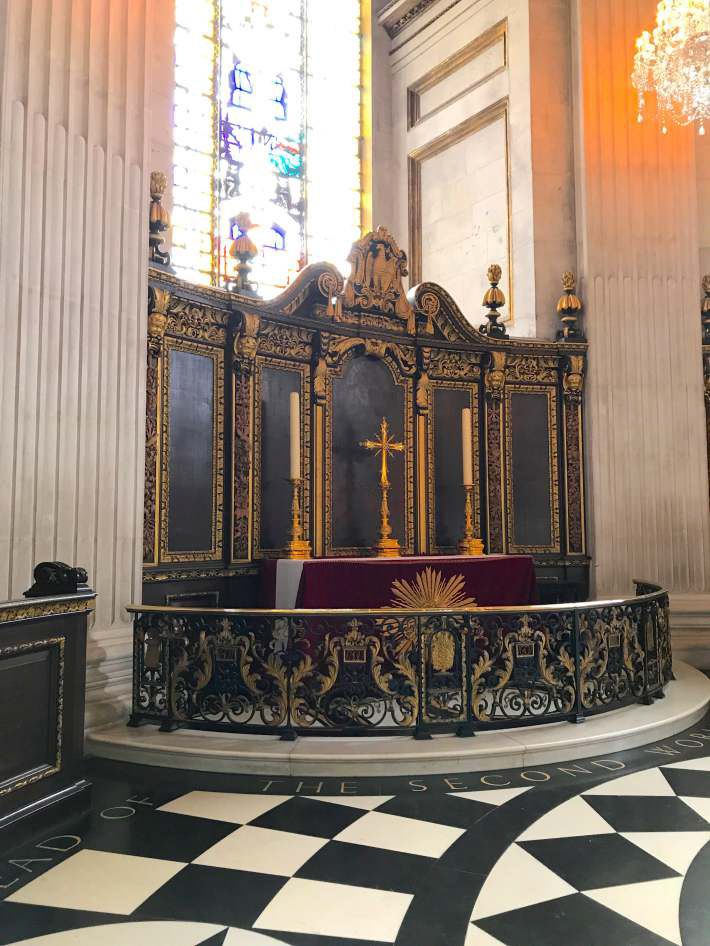
5. Objective:
The main objective is here – a large crate which when destroyed will cripple the outpost.
The crate is behind the main altar which is defended by several chasing enemies.
There are three parallel approaches to the crate which the player can use.
Once the player destroys the crate waves of enemies will descend on the player
They now must escape the Cathedral and complete the level once they have left the area.
The Groundfloor Walkthrough
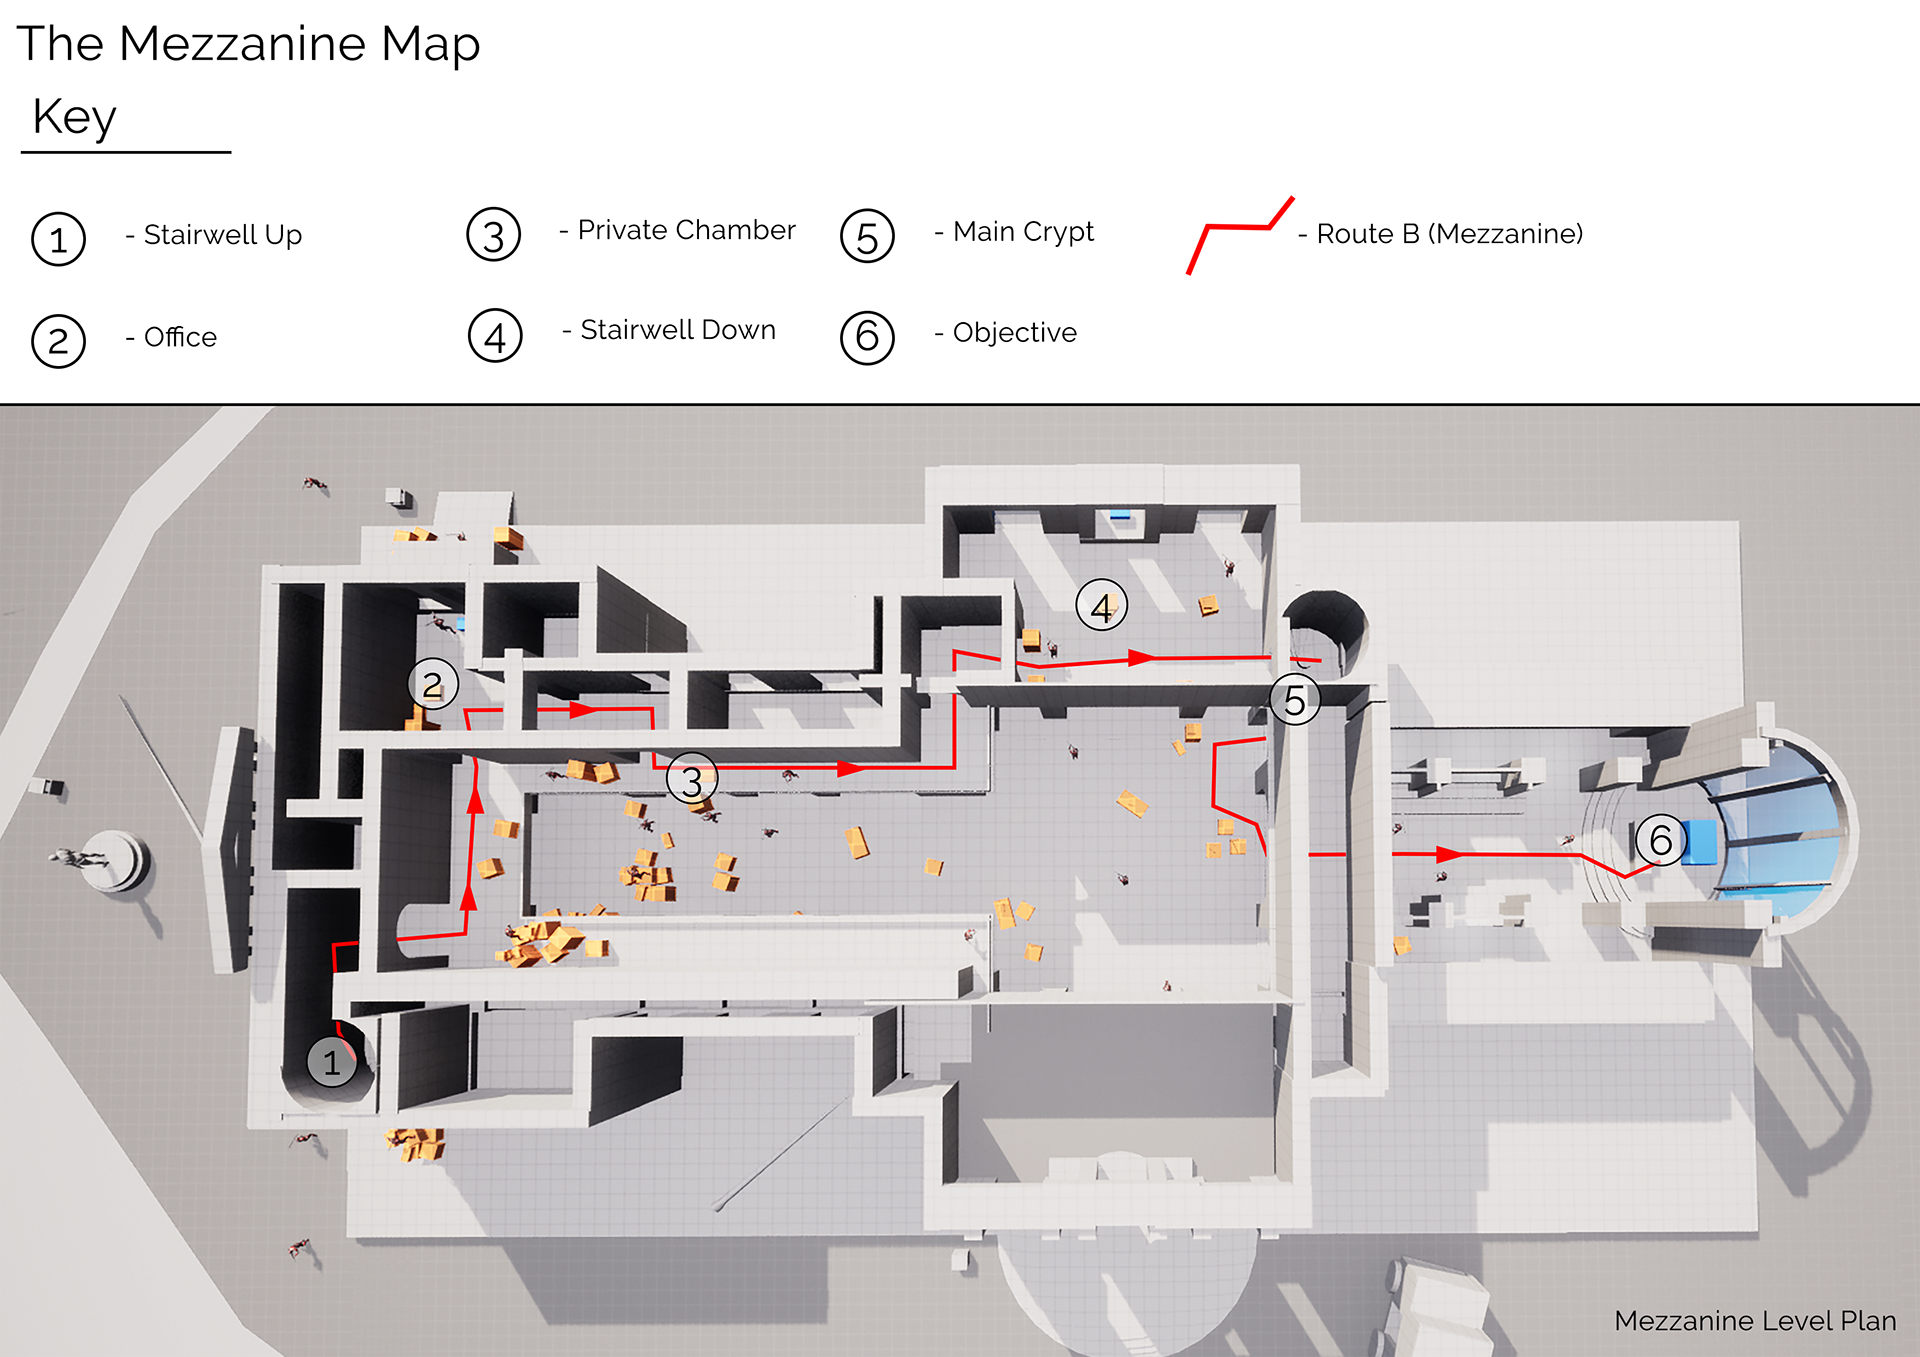
The mezzanine route challenged the player to use sniper rifles and stealth.
1. Stairwell Up:
The player begins this route by going up the spiral stairs. From the landing they can see an obstructed view of the mezzanine.
They will see static enemies and a couple chasing enemies.
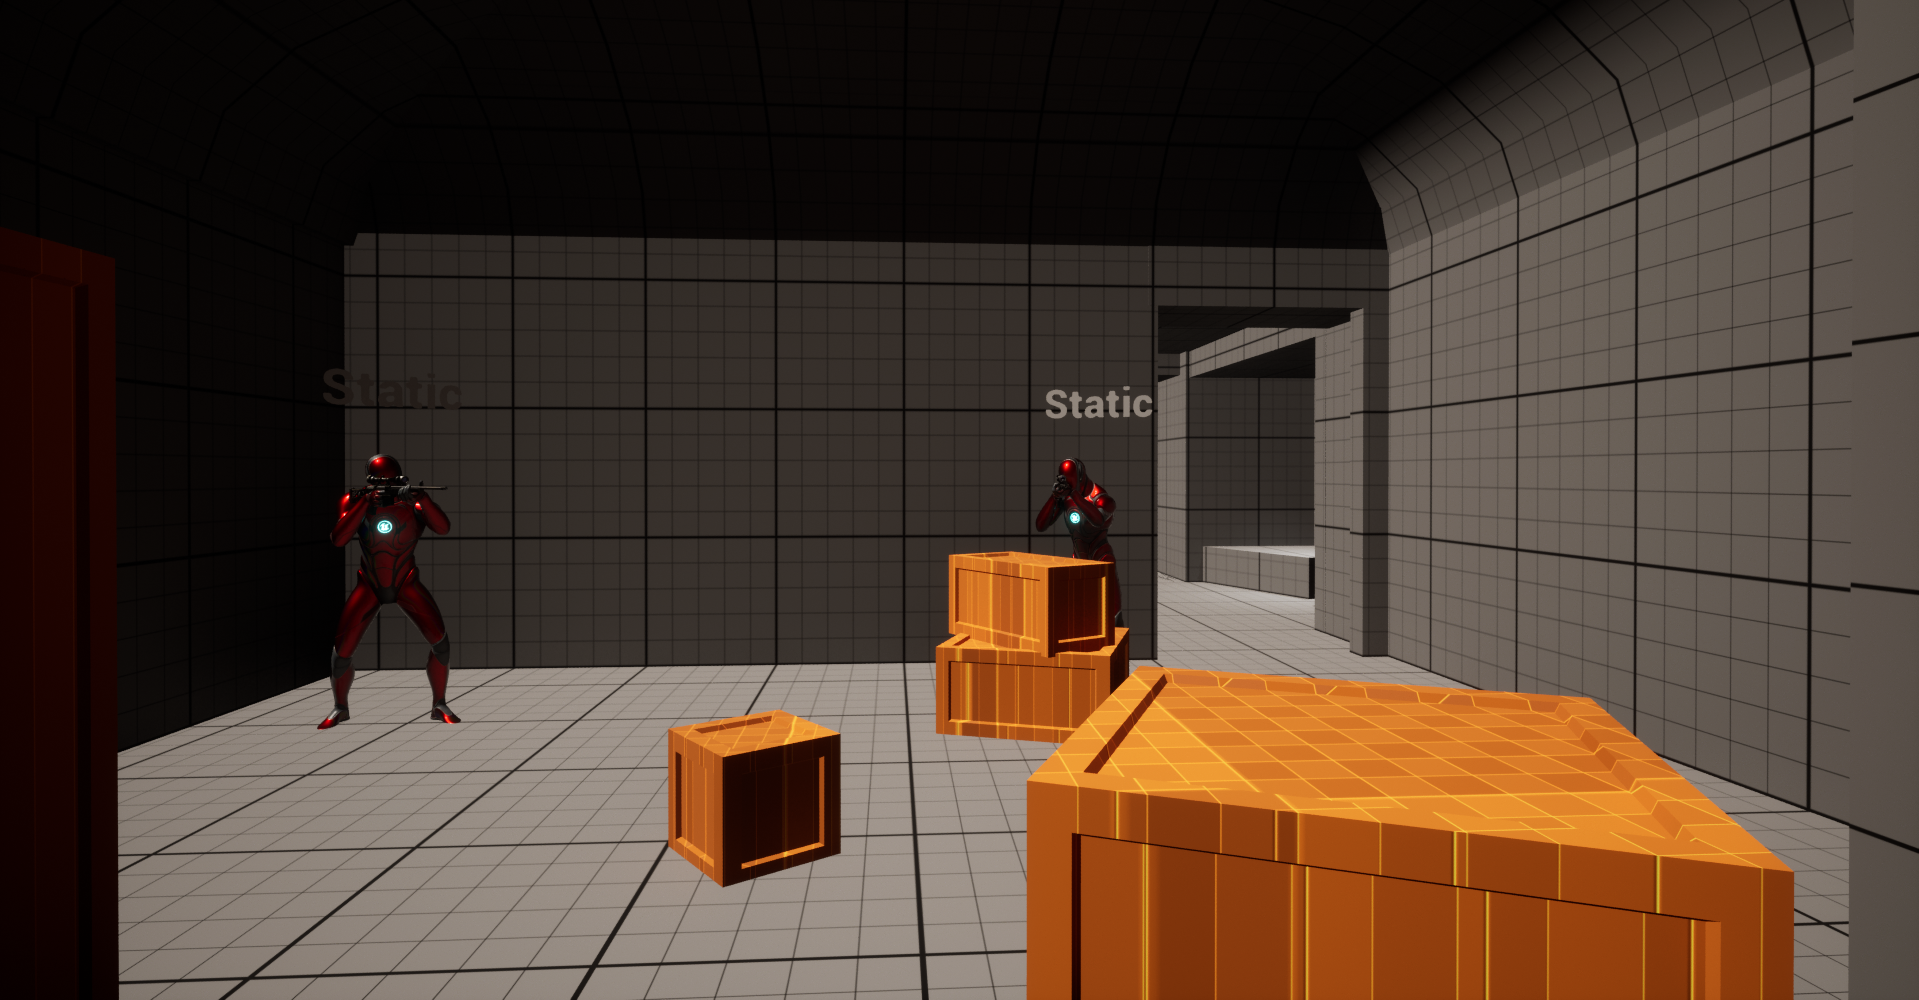
2. Office:
There are two static enemies in this room.
They are facing away from the player and can be taken out stealthily using your team mates.
The bodies can be hidden in a nearby cupboard to avoid suspicion
There is a crate with Ammo and Health
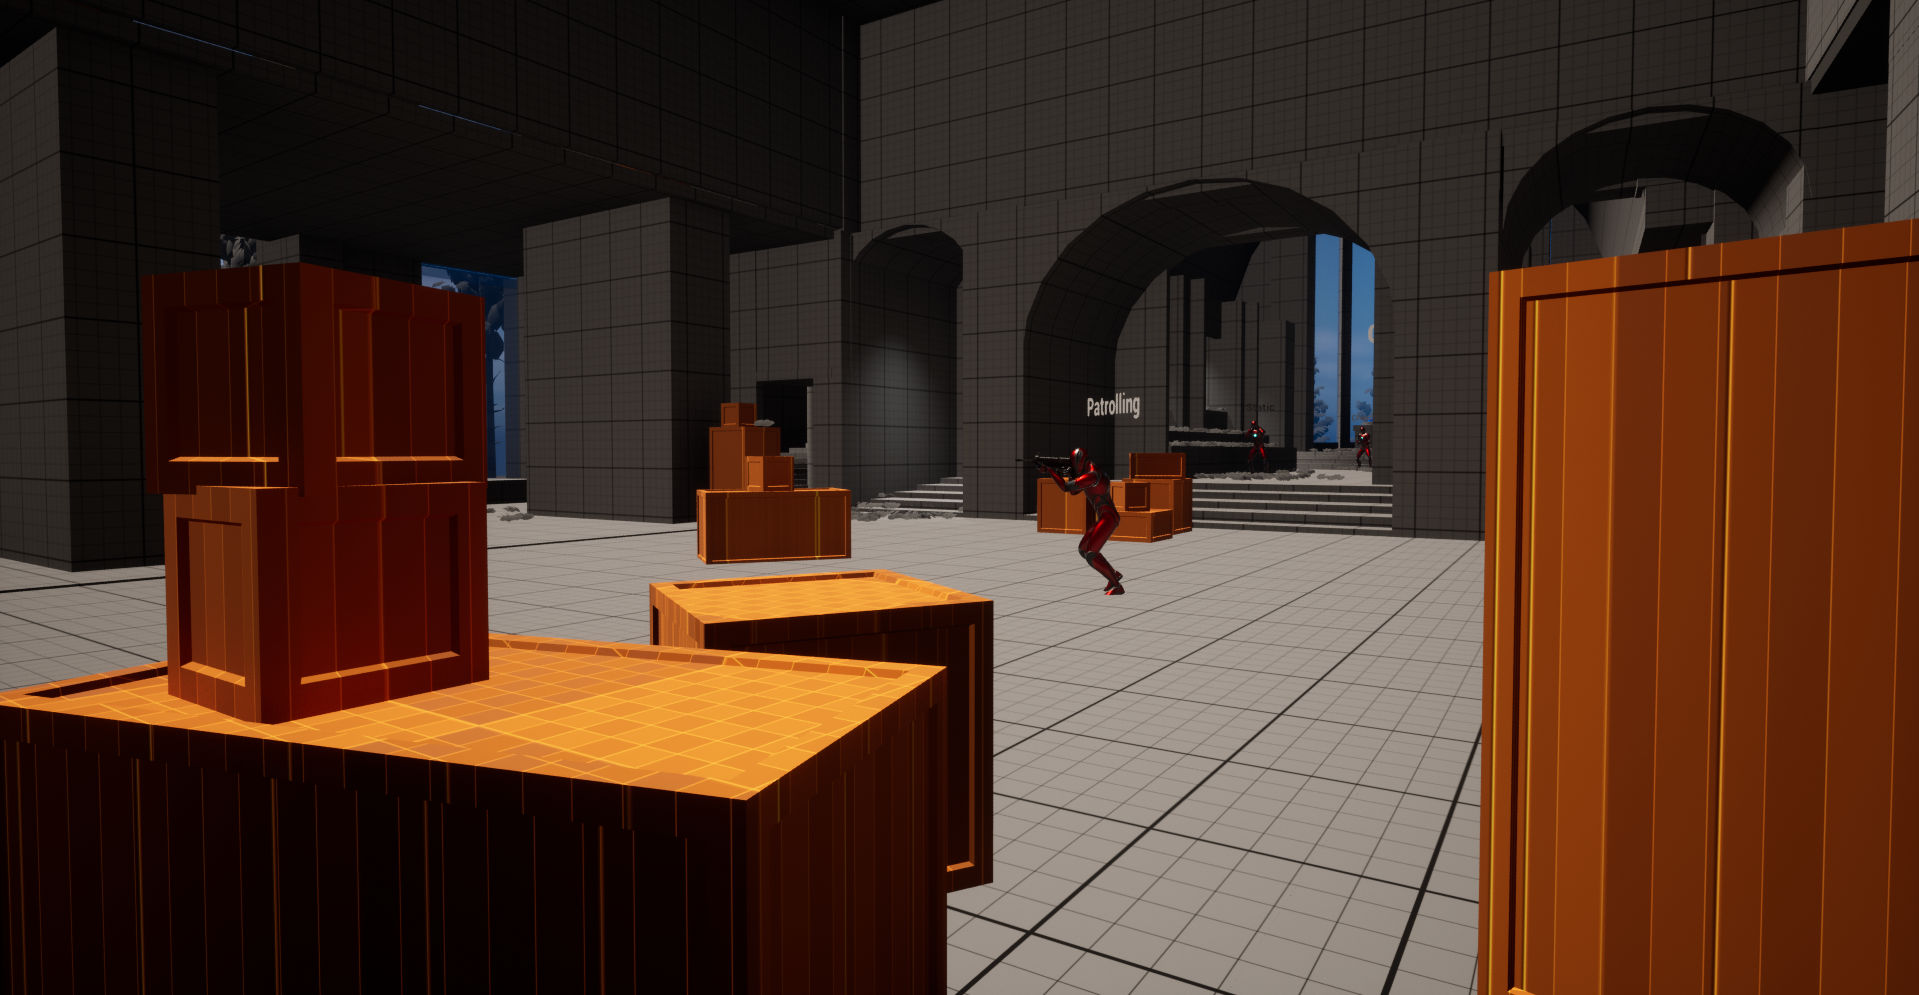
3. Mezzanine:
The player should crouch alone this walkway to avoid sniper fire from the opposite mezzanine.
The player will need to take out an enemy in their path.
4. Private Chamber:
This is the main combat area for this route.
The player will encounter two patrolling enemies that they will need to eliminate before they can make their way down stairs.
These bodies can be hidden but not necessarily.
There is a crate here with Ammo and Health.
5. Stairwell Down:
The player should then make their way down stairs.
At the base of the stairs are some boxes for cover.
Avoiding the patrolling enemies, the player can then make their way towards the objective.
6. Objective:
The main objective is here – a large crate which when destroyed will cripple the outpost.
The Mezzanine Walkthrough
Greyboxed Level